
Amateur Radio
Having always had an interest in electronics and radio, it seemed pretty natural for me to get into the world of amateur radio. Being able to transmit means taking a few exams in the UK, there are three stages – Beginner, Intermediate and Full. While studying for the beginners license, I was already listening to AM bands.
Shortwave listening
Back in 2018, I bought an ICOM 8500 receiver (below) – this is a wide-band communications receiver and very high quality. It needed at least two aerials to cover some of the frequencies it could receive. As is very common with amateur radio, building your own aerials is part of the fun.

With my minimal knowledge and a little research, I decided that a nest of basic dipole aerials would cover the higher frequencies with a broadband magnetic loop to cover the low bands up to 30Mhz. Below is my mast being assembled, the aerials would be switch-selected to suit the band I was listening to as no single aerial could cover the range alone.

The dipoles are all made from common products like pvc electrical conduit and fittings, copper wire etc. The longer the dipole, the lower the frequency it covers due to wavelength.
The mast was mounted so the top was below the roof line of the house – this meant no planning permission was needed. The magnetic loop is a very thin wire and can just be seen on the top. I kept the brackets near the bottom so I could fit and remove it without ladders, the 50mm heavy-duty aluminium mast is 6m long.

Going digital
The ICOM 8500 performed well, at least until I discovered something called SDR – Software Defined Radio. SDR is a relatively new branch of digital radio technology which uses a small receiver box connected to a computer, the receiver receives all transmissions in a broad band of frequency, the computer then runs software which decodes it, displays it, stores memories etc.
SDR was a real eye opener in the world of radio listening, being able to actually ‘see’ radio transmissions as well as hearing them was amazing. Below is a picture of the SDR radio tuned to a section of the 20m amateur band – around 14Mhz. The peaks in the middle area are transmissions, the area below is a ‘waterfall’ and shows each transmission over time.
Tuning to a particular transmission is as simple as moving the mouse thumbwheel, sound comes from the computer sound output. On the far left of the bottom screen area is morse code – the waterfall actually shows morse as a series of dots and dashes that can be heard or read.

The SDR is heavy on computer screen use – it needs a lot of screen space to make it more fun. Below I have added another monitor to the SDR PC on the left, this has my decoding software for digital comms on it here and the main one has the SDR radio, on the right is an old MAC mini I use for web browsing at the same time. The PC is an old Dell desktop I got from eBay, SDR does not need a super-computer to run it.

A little later I fitted a multi-monitor stand to tidy things up a little.


Being run on a PC meant you can also run other software to decode certain transmissions. Below is a decoded ‘WeFax’ transmission – WeFax is a marine weather chart service that is broadcast 24hrs a day on certain frequencies. The novelty wears off pretty fast but for the first few times it is very interesting to watch as the image is built up line by line the same way FAX transmissions used to be.

Transmitting
Up to mid 2019 my experience was just listening, it was great but was getting a bit tired now, I wanted to be able to transmit as well and that meant studying and sitting a series of exams.
Being technically minded, the exam content was not too onerous for the first stage or ‘beginners’ license. This license would give me the ability to legally transmit on certain AM bands with a power level restricted to 10 watts.
I joined the local radio club in order to sit the exam after about 6 weeks of study, at the time the exams were only done in certain places and had to have a club invigilator on site to sit-in on the written portion and also to perform the practical portion of the exam with you.
I passed the beginners exam and after sending my details off to OffCom I received my license a few weeks later, my callsign was M7DJK.
I soon picked up my first transceiver – the tiny Xiegu G90 SDR…

The Xiegu G90 is a great 1st radio, it has a max of 25W of output and covers all UK bands used by beginners licensees. It’s very compact and can be used in vehicles for mobile work as well.
Having 10 watts of power was ok and on a good day it can get you into Europe easily but I wanted more of course – this meant studying for the intermediate license which would give me 50 watts of output.
I started studying but by the time I was ready to sit the exam, the Covid pandemic had struck and all exam centres/clubs were closed down. Luckily, the Radio Society of Great Britain, the RSGB, was moving with the times and had started to do the exams online via a Zoom meeting type setup – fantastic.
They had also dropped the practical portion of the test so it could all be done online now. A slot was booked and the exam was taken. I passed it and after sending my details off to OffCom again, received my license shortly afterwards. My callsign is now 2E0FWL.

I now had the ability to use 50W but not the radio – an upgrade was needed. I did some research but it didn’t take long to see that the all-round No1 radio was the ICOM 7300. This radio had a 100W limit and was absolutely packed with features. The Xiegu G90 was sold-on for just less than I paid for it and the funds put towards the 7300 which was not a low cost item at all.
A change in aerial was needed but having only a small garden restricted my options a lot. After trying out many different styles, I settled on an aerial called a ‘doublet’ in the radio world. Its basically a “T” shaped item, fed by a central connection.

Above is shown one end of my doublet, its 26m long and 7m off the ground – this is low for an aerial but it’s all I can do here. The centre is supported by a fibreglass pole in an umbrella base.
The doublet performed very well, I mostly use digital modes on-air, these are similar to texting on a phone, its all keyboard controlled. I do use voice occasionally but it’s pretty rare for me.
Below is a screen image of a signal tracking website I use to see how far my transmissions are going. As you can see it’s pretty much worldwide but biased West to East – this is because of the orientation of my aerial mostly. The distance covered varies by weather, time of day, day of week etc – this is a fascinating aspect of amateur radio.

The digital modes I use mostly are JS8 – a great mode and works well in poor conditions, PSK30 – similar to JS8 but faster, not so good in poor conditions, RTTY – radio teletype, another text based system, one of the oldest there is.
Then there is FT4 & FT8 – these are two non-conversational modes which are great for tracking transmission conditions or testing your reach etc.
The oldest method is probably CW or Continuous Wave – otherwise known as Morse Code. I have tried learning this but so far not really succeeded yet, it’s pretty much like learning a foreign language.
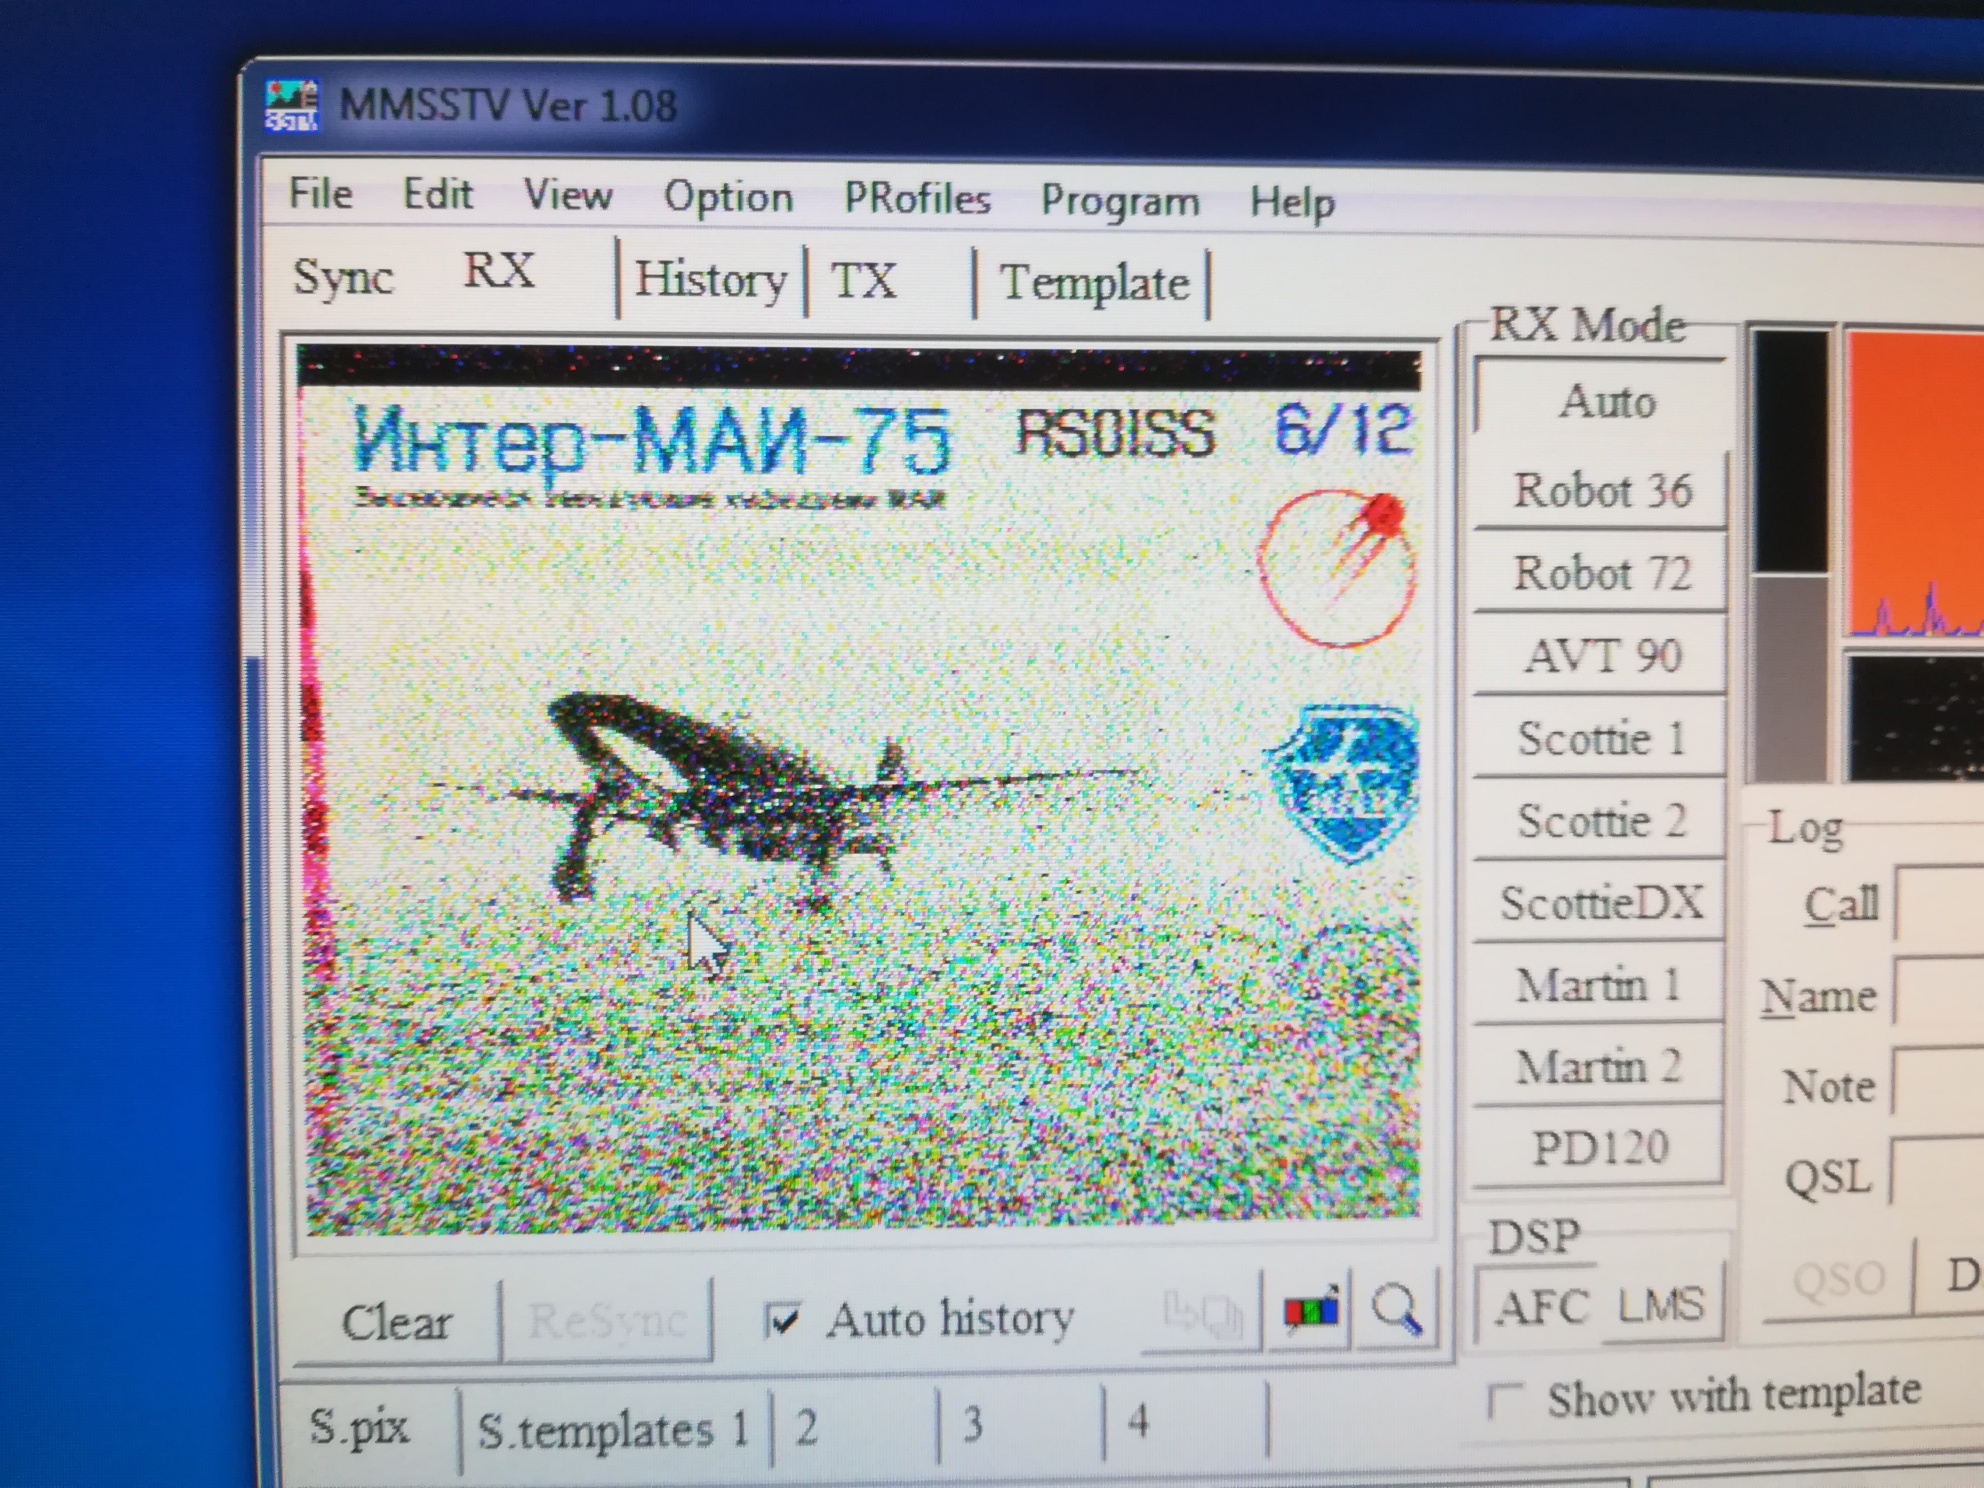
Then there is SSTV – Slow Scan Television. Using SSTV you can send and receive pictures as far as conditions, will allow, this is great fun. I have managed to receive an image from the ISS, the International Space Station – they transmit various modes and if you wait for them to pass over you can usually receive something although you only get one chance!

That’s pretty much where I am today in late 2021, I have no need to go for the advanced/full license yet as I am finding the 50 watt limit is working well and the few extra bands and modes allocated to full licensees are not of interest yet. My callsign is still 2E0FWL.
Update: In late 2024, the RSGB updated the licensing conditions and intermediate users are now allowed to use 100W of transmitter power, this offers a useful gain especially if you are limited on the choices of aerial used etc.